Tuesday, February 17, 2009

Mushroom Salad

I find that people fall into two camps on the subject of mushrooms- LOVE!, or, EW FUNGUS GET IT AWAY DON'T LET ANY OF MY FOOD TOUCH IT EWWWW!!! Since the title of this post is (imaginatively) "Mushroom Salad", I'm pretty sure you know where I stand. So... those of you in camp 2 might want to avert your eyes.

(Ahhhh!!! Fungus!!)

So, the mushroom salad. I have to admit, I kind of love The Melting Pot restaurant- yes, it's a little hokey and to quote my ex-boyfriend, "You have to cook your OWN FOOD!", but I happen to love cheese a lot, almost as much as I love dipping assorted items into cheese. Anyway- the Melting Pot does have (a few) non-fondue items on the menu, and one that I've been ordering for probably more than a decade now on my occasional visits is the mushroom salad: basically a huge plate of raw, thinly sliced white mushrooms covered with a lemony-Parmesan dressing. That's it, and yet I never thought about making it for myself.

And then this past Saturday morning, fate and the Food Network intervened. I was enjoying not having much to do, with my usual Giada/Ina lineup in the background on the tv. Then one of Giada's recipes caught my attention- mushroom salad, simply dressed with a lemon dressing and Parmesan... that sounded familiar! I added mushrooms and lemons to my list and was off to Whole Foods.

So... thankfully I decided to buy two containers of mushrooms, because I "tested" this salad for my lunch and managed to polish off an entire one by myself. It's really that good (if you're the mushroom type, of course), and take approximately thirty seconds to prepare- put sliced mushrooms in a bowl; whisk lemon juice with olive oil; top with the dressing, parsley, grated Parmesan cheese, salt, and pepper. The mushrooms soak in the tangy dressing, and their flavor combines beautifully with the parsley and cheese. It's absurdly simple, but all of the components work together to produce something with a much more complicated taste.

Seriously- if you're in the "love mushrooms" camp like me, you will be SO happy to have this up your sleeve.

Ingredients
  • 12 oz. large button mushrooms, trimmed, cleaned and thinly sliced
  • Chopped fresh flat-leaf parsley, 2 Tablespoons
  • Extra-virgin olive oil, 2 Tablespoons
  • Fresh lemon juice, 2 Tablespoons
  • Kosher salt and freshly ground black pepper
  • 1 tablespoon freshly grated Parmesan cheese
Method

In a medium salad bowl, mix together the mushrooms and parsley. In a small bowl, whisk together the oil and lemon juice until smooth. Season with salt and pepper, to taste.

Add the oil mixture to the salad bowl and toss until all the ingredients are coated. Add the Parmesan cheese and serve.

Monday, February 16, 2009

Asparagus Lasagna

Last Friday kicked off quite the weekend of cooking- I got to try out some new recipes and spend time with some of my wonderful friends and family! But after cooking three out of the past four days straight, I'm definitely ready for a breather- hence tonight's leftover spaghetti squash and tomato soup dinner. Leftovers, gotta love 'em.

But back to Friday, and the afore-mentioned new recipes. My friends Dana and Dave came over Friday to catch up, eat, and- exciting news- discuss my kitchen renovation plans!! I love my little condo, but the kitchen cabinets and counters are sadly stuck in the 80's. Hopefully with Dave's help, that will soon be an unpleasant memory and I'll have a great new kitchen.

Since I was working until 5:30 on Friday and my friends were arriving around 7:30, I had to plan my attack carefully. Thursday night, I paged through some of my go-to cookbooks and found Giada's recipe for asparagus lasagna, which sounded perfect- a classic with a twist that I could prepare right after work, then relax with my friends. I hate having friends over and then being chained to the kitchen sauteeing or assembling, so recipes which can be made ahead of time and just stuck in the oven are ideal.

(photo courtesy FoodNetwork.com...
but I promise, mine looked almost as pretty!)

This was fairly easy to assemble, and I love the idea of using a sun-dried tomato pesto instead of a typical marinara. Before making the Whole Foods run, I read some of the reader reviews for this recipe on FoodNetwork.com, which indicated that dryness could be an issue with the noodles. I decided to substitute a can of diced tomatoes for one of the two recommended sun-dried tomato jars and was really happy with the result.

The only issue I had with this recipe is that although it calls for pancetta (yay! Italian bacon!), there's no indication what to do with the pancetta once you've sauteed and drained it. Oops! As a result, my lasagna was completely assembled before I realized the omission, so I just sprinkled it on top. It ended up being fine and probably helped get the pancetta pieces a little more crispy, but I may try adding it into the filling next time. I suppose we'll never know what Giada intended!

(Poor homeless pancetta!)


(Dear Giada, where does the
pancetta go?! Love, Dana)

So aside from these small issues, the preparation for this lasagna went smoothly. The ricotta cheese filling is mixed with sauteed chopped onions and asparagus, then layered with the sun-dried tomato pesto (sorry, no pics of that... operating both a food processor and a camera strains my meager technical abilities!), noodles, Parmesan cheese, and mozzarella cheese.

(asparagus filling prep)

(asparagus and onions sauteeing)


(Ooh... lasagna cross-section)

The final step is to dot the top with butter in preparation for baking, and from there I just wrapped the lasagna and let it hang out until we were ready for dinner. Happily, this was a first-time recipe that worked out beautifully- everyone loved it and impressively, the four of us were able to polish off the entire dish (and a few bottles of wine never hurt!). Maybe I'll make it next to break in my soon-to-be NEW kitchen!

(Pre-baking, assembled lasagna)

Ingredients

  • 9 lasagna sheets, fresh or dried
  • 1 teaspoon olive oil, plus 1 tablespoon, divided
  • 2 (8.5 oz.) jars sun-dried tomatoes, drained (*or substitute one 12 oz. can of diced tomatoes, and their liquid)
  • 1 1/2 packed cups fresh basil leaves
  • 1/2 cup grated Parmesan, plus 3/4 cup
  • 1/4 pound pancetta, diced
  • 1 medium onion, diced
  • 2 garlic cloves, minced
  • 4 bunches asparagus, trimmed and cut into 1-inch pieces
  • 1 (15 oz.) container whole milk ricotta cheese
  • 1 teaspoon salt
  • 1/2 teaspoon freshly ground black pepper
  • 2 cups shredded whole milk mozzarella cheese
  • 2 tablespoons butter

Directions

Bring a large pot of salted water to a boil over high heat. Add 1 teaspoon olive oil. Add the pasta and cook until tender but still firm to the bite, stirring occasionally, about 8 to 10 minutes for dried pasta or 2 to 3 minutes for fresh pasta. Drain pasta.

In a food processor combine the sun-dried tomatoes and basil (and diced tomatoes if using). Pulse until the mixture is combined. Transfer to a small bowl. Stir in 1/2 cup Parmesan. Set aside.

In a large skillet brown the pancetta until crisp. Remove from the pan using a slotted spoon. Add 1 tablespoon olive oil, onion, and garlic and cook until tender, about 4 minutes. Add asparagus and cook until tender, about 4 minutes. Transfer the mixture to a large bowl. Add the ricotta, salt, and pepper and stir to combine.

Preheat the oven to 350 degrees F. In a 9 by 13-inch baking dish sprinkle some of the sun-dried tomato mixture on the bottom of the casserole dish. Place some lasagna sheets, then half asparagus mixture. Next sprinkle some mozzarella cheese and some of the remaining 3/4 cup Parmesan. Continue for 1 more layer. Top with lasagna sheets, some sun-dried tomato mixture, mozzarella, and Parmesan. Add pancetta to top and dot the top with butter. Bake until the ingredients are warm and the cheese is melted, about 25 minutes.

Saturday, February 14, 2009

Spaghetti Squash "Cacio e Pepe"

I love all vegetables, but there are some that I REALLY love, and that favored list includes spaghetti squash. So what better to make for a lazy Saturday lunch for myself?


Spaghetti squash was a total mystery to me until this fall, when I read this recipe on the amazing blog "Always Order Dessert" written by Reamonn's friend Alejandra. When I tried it out, I couldn't believe that I'd never made spaghetti squash before- it is so easy and delicious! As I've mentioned, I adore pasta and am constantly looking out for ways to make a heaping bowl of pasta a little healthier. This, similar to the zucchini/squash pasta preparation, is the perfect way to get that "big bowl of pasta" comfort food feeling and feel a little healthier too.

I loved Alejandra's sage and brown butter preparation, but my go-to for spaghetti squash lately has been a sort of "cacio e pepe"- a play on the traditional Roman black pepper and Pecorino Romano pasta. It really couldn't be simpler- after steaming the squash, I toss the strands with olive oil, lemon juice, a little butter, salt, cracked black pepper, and lots of Parmesan cheese. It's very flexible to pantry items; if I have cream in the fridge, I'll toss in a spoon of that as well to coat the strands, and sometimes add in some chopped Italian parsley or arugula (which I had today, yum) for color and a little additional flavor. It's comforting and delicious, the perfect bowl to curl up with on the couch during a lazy hour of tv watching.

Ingredients
*1 spaghetti squash
*Good extra-virgin olive oil, 1 tablespoon
*Butter, 1 tablespoon
* Lemon juice, to taste (roughly 1/2 tablespoon)
*Grated Parmesan or Peccorino Romano cheese, 1 tablespoon
*Chopped Italian parsley or baby arugula leaves, 1 tablespoon
* salt and cracked black pepper to taste

Method
Preheat oven to 375 degrees. Use a sharp knife to split the spaghetti squash in half. Place both halves face down in a roasting pan filled with about an inch of water, and cover with foil. Bake in the oven for 30-40 minutes, or until a fork inserted in the skin of the squash pierces it easily. Flip the squash and cook, uncovered, for an additional 20 minutes.


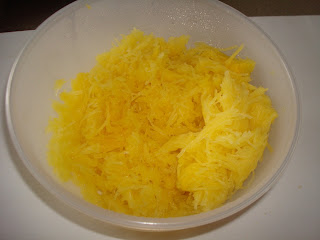
Let cool. Use a spoon to gently scoop out the seeds from the middle of the squash. Then, use a fork to scrape the flesh of the squash away from the skin- it should pull off in thin strands, like spaghetti.


Toss the spaghetti squash with butter, olive oil, lemon juice, Parmesan cheese, parsley or arugula, salt, and pepper.

Happy Valentine's Day!

Love, La Dolce Bacon

Thursday, February 12, 2009

Zucchini and Yogurt Farfalle

Sometimes I head home from class with an ingredient in my mind, waiting for me in the fridge for a quick preparation. Tuesday night, I had butternut squash on my mind- I'd bought a package of pre-cubed squash a few nights prior and was looking forward to my first time cooking with it. Since it had been a long day of work and class, I was picturing an Ina Garten butternut squash risotto recipe; something warm and comforting seemed just the thing for that evening.

Unfortunately, my plans hit a snag in the form of some suspicious mold on the squash. Walking the two blocks to Whole Foods was definitely not in my energy level, so I had to figure out a Plan B involving the next fresh vegetable in my fridge: two zucchini. Thankfully, I remembered a recipe that I got this summer at the U Street farmer's market and it proved to be just what I wanted after a long day.


Pasta is my ultimate comfort food, and adding zucchini to the pasta is something I love to do once I tried this recipe the first time; somehow it feels just a little bit healthier and more virtuous than a straight bowl of pasta, and it looks so pretty. Spring is unfortunately still a few weeks away here in D.C., but when I eat this, it doesn't seem quite so far away.

(leaning tower of Zucchini)

The method here couldn't be simpler- wash and grate zucchini while salted water boils for pasta, add pasta (I like farfalle or ziti with this); cook pasta for roughly 6-8 minutes until it is a little bit more than al dente (about 1-2 minutes from being perfectly cooked) and then add the zucchini to the pot; drain pasta and zucchini together; toss Greek yogurt, butter, Parmesan cheese, lemon juice, nutmeg, salt, and pepper into the pot and stir together; add pasta and zucchini; toss; eat.

(that's it!)

Well, almost- I had to add a meat product, so some salami seemed just the thing. But that part is entirely optional, although I definitely think most things are better with pork products (sorry, Mom!).


I also think that this sauce is really versatile, as a nice alternative to a heavy cream or Alfredo-style sauce for pasta, and it even keeps well- just add a splash of water when reheating the pasta and sauce to bring it back to life after the microwave.


Ingredients
-Serves 1-2

* 1/2 lb. farfalle or other small pasta
* 2 medium zucchini, coarsely shredded on a grater
* 2 Tablespoons unsalted butter
* 1/2 cup whole-milk Greek yogurt
* 1/2 cup grated Parmesan cheese, plus more for serving
* 1 Tablespoon lemon juice
* Nutmeg
* Salt and freshly ground pepper

Method

1. In a large pot of boiling salted water, cook the farfalle until just before al dente (roughly 6-8 minutes). About 1 minute before the pasta is done, add the shredded zucchini to the pot. Cook for 1 minute more and drain, reserving 1/4 cup of the pasta water.

2. Melt the butter over low heat in the pot, then remove from heat. Stir in the Greek yogurt and Parmesan cheese, then season with the lemon juice, nutmeg, and salt and pepper.

3. Add the farfalle, zucchini, and reserved pasta water to the pot and cook over low heat, tossing until the sauce coats the pasta. Serve with additional Parmesan cheese and cracked pepper.

Wednesday, February 11, 2009

Blog Redesign

I spotted this a few days ago- and really, what could be more appropriate for this blog? May I present "La Dolce Bacon, with bacon!"

Monday, February 9, 2009

Ribollita "Winter Soup"

It's a cliche for a reason: there's really nothing more comforting and soothing after a long, cold day in early February than a huge pot of soup. About a month ago, I was browsing "Barefoot Contessa at Home" for the seventh or so time, and this recipe just tugged at me- loaded with Italian white beans, sourdough bread, kale, and of course, smoky pancetta, it seemed the perfect thing to warm up my apartment and myself during a D.C. winter. As soon as I polished off my first bowl, I was hooked.

This isn't a soup that you taste in delicate sips- it's meaty and robust, and wonderfully filling without being leaden in your stomach afterward. Plus, it makes a BIG pot, which is perfect for a lazy Sunday afternoon when you want a nice project for an hour or so, and enough payoff for a few leftover meals. It's almost ridiculous how many times I've made this in the past month, yet I'm not even slightly sick of it yet.

I hate to mess with genius, but there are a few aspects of Ina's recipe that I had to tweak to make this soup my own. First, the meat. The first time I made this, I faithfully used pancetta but was disappointed- the smoky aroma dissipated in the soup, leaving fairly bland chunks of pancetta and almost no flavor in the broth. So, I made a switch to smoked BACON (of course!) and was amazed at the improvement. The bacon really infuses its flavor into the vegetable aromatics that make up the base of the soup, and makes the whole dish taste much more complex and delicious. And I swear that's not just my bacon prejudice talking!

(Mmmm... aromatics and bacon...)

Since my crazy life schedule doesn't exactly allow for the planning and execution of something like soaking dried beans overnight, I've used canned cannellini (white kidney) beans instead. Just make sure to rinse off the liquid from the cans before adding them to the soup or food processor. In addition, since there is no "bean soaking liquid", I just use a little chicken stock in the puree step. Sorry, Ina... I promise to try it your way sometime, I swear! I've included both preparations for the recipe below, so definitely let me know if I'm missing out by ignoring the dried beans.

I also like to drop in a Parmesan cheese rind once the chicken stock has been added, so that there's enough liquid for the rind to release its flavors into the broth. I read this article last year, which gave me the impetus to grab a container of Parmesan rinds at Whole Foods to keep in the freezer for such occasions as this soup. Adding one or two to a pot gives a savory layer of flavor to the soup and also ties in nicely when you add a sprinkling of cheese on top of the finished dish.

(Cheesy goodness!)

Finally, I prefer to use a heartier wheat bread for the bread cubes than Ina's recommended sourdough, but you should feel free to try both versions. I like that the wheat bread has more of an earthy, nutty taste- it seems to go with this peasant-y soup to me. I also decreased the amount of bread cubes, since this bad boy can get pretty dense (albeit delicious!).

(I heart carbs)

Ingredients

  • 1/2 pound dried white beans, such as Great Northern or cannellini (or 2 cans beans)
  • Kosher salt
  • 1/4 cup good olive oil, plus extra for serving
  • 1/4 pound large diced pancetta (or smoked bacon)
  • 2 cups chopped yellow onions (2 onions)
  • 1 cup chopped carrots (3 carrots)
  • 1 cup chopped celery (3 stalks)
  • 3 tablespoons minced garlic (6 cloves)
  • 1 teaspoon freshly ground black pepper
  • 1/4 teaspoon crushed red pepper flakes
  • 1 (28-ounce) can Italian plum tomatoes in puree, chopped
  • 2 cups coarsely chopped or shredded savoy cabbage
  • 4 cups coarsely chopped kale
  • 1/2 cup chopped fresh basil leaves
  • 8 cups chicken stock
  • 2 cups sourdough bread cubes, crusts removed
  • 1/2 cup freshly grated Parmesan, for serving

Directions

If using dried beans: In a large bowl, cover the beans with cold water by 1-inch and cover with plastic wrap. Allow to soak overnight in the refrigerator. Drain the beans and place them in a large pot with 8 cups of water, and bring to a boil. Lower the heat and simmer uncovered for 45 minutes. Add 1 teaspoon of salt and continue to simmer for about 15 minutes, until the beans are tender. Set the beans aside to cool in their liquid.

Step 1 if using canned beans; Step 2 if using dried beans: Heat the oil in a large stockpot. Add the pancetta/bacon and onions and cook over medium-low heat for 7 to 10 minutes, until the onions are translucent. Add the carrots, celery, garlic, 1 tablespoon of salt, the pepper, and red pepper flakes. Cook over medium-low heat for 7 to 10 minutes, until the vegetables are tender. Add the tomatoes with their puree, the cabbage, the kale, and the basil and cook over medium-low heat, stirring occasionally, for another 7 to 10 minutes.

If using dried beans: Drain the beans, reserving their cooking liquid.

If using canned beans: Rinse the beans in water.

Next step for both preparations: In the bowl of a food processor fitted with a steel blade, puree half of the beans with a little of their liquid (or chicken stock if using canned beans). Add to the stockpot, along with the remaining whole beans. Pour the bean cooking liquid into a large measuring cup and add enough chicken stock to make 8 cups (or just add 8 cups stock if using canned beans). Add to the soup and bring to a boil. Reduce the heat and simmer over low heat for 20 minutes.

Add the bread cubes to the soup and simmer for 10 more minutes. Taste for seasoning and serve hot in large bowls sprinkled with Parmesan and drizzled with olive oil. Enjoy!


(Not the prettiest to look at, but trust me,
you won't be able to stop eating it!)

Friday, February 6, 2009

Goodbye Glasses, Hello Cupcake!


To celebrate my first day of post-Lasik vision, I swung by Hello Cupcake on my way home from the eye doctor and picked up the "pastry chef's special": pink lemonade cake with lemon-cream cheese frosting. Definitely a delicious decision!

Wednesday, February 4, 2009

Roasted Shrimp and Broccoli

This recipe is my answer to everyone who tells me that there's never any time to cook a decent meal during the week. I started making this at 8:43 (and Lilly can vouch because that's when we got off the phone!), put it in the oven and sat down on the couch at 8:55, and was eating and watching "LOST" at 9:05. Twelve minutes, people! Twelve minutes of "cooking," and I really use the term loosely for this delicious dish.

(Photo courtesy of The New York Times...
trust me, you'll know when they aren't mine!)

Melissa Clark, the fantastic food writer for "The New York Times", published this recipe last month and I have made it four times since- it's truly the perfect quick weeknight meal. Two main ingredients, a small batch of spices, oil, and lemon come together in surprisingly complex flavors for their simplicity, and there are only two dishes to wash at the end! Perfection.

(Patron saint Ina Garten watches over the preparations)

Here's what you need:

*Shrimp: 1 lb.
-I always keep a bag of shelled, tail-on shrimp in my freezer for occasions such as this. They thaw in minutes in a colander with a stream of lukewarm water and are perfect for impromptu, throw-together dishes.

*Broccoli: 2 lbs.
-I used broccolini, which is more slender and slightly sweeter than normal broccoli, but both types are equally delicious here. When using broccolini, you can use the entire stalk, but just use the florets when using broccoli.

*Spices: Coriander (1 tsp. whole seeds or 1/2 tsp. ground), cumin (1 tsp. whole seeds or 1/2 tsp. ground), 1/8 tsp. chili powder, 1 1/2 tsp. salt, and 1 tsp. pepper.

*Olive oil: 4 Tablespoons

*Lemon: 1 1/4 tsp. zest (the zest from one lemon), and the juice.
-I like this recipe because it makes use of an entire lemon. The zest is used to flavor the shrimp, the juice is squeezed over the whole finished dish, and you can throw the used lemon halves into the disposal for a fresh-smelling kitchen. Martha would approve!

Here's what you do:

1. Preheat oven to 425 degrees. In a large bowl, toss the broccoli with 2 tablespoons oil, coriander, cumin, 1 tsp. salt, 1/2 tsp. pepper and chili powder. Spread broccoli in a single layer on a baking sheet and roast for 10 minutes.

(Yummy spices and broccoli)

2. Combine shrimp, remaining 2 tablespoons oil, lemon zest, remaining 1/2 teaspoon salt and remaining 1/2 teaspoon pepper (I use the same bowl from the broccoli). Add shrimp to the baking sheet and toss with broccoli. Roast, tossing once halfway through, until shrimp are just opaque and broccoli is tender and golden around edges, about 10 minutes more. Serve with lemon wedges, or squeeze lemon juice all over shrimp and broccoli just before serving.

(Did I mention this took 12 minutes?!)

Yields 4 servings, which can feed 2 hungry people! Tonight, I halved the recipe for myself and polished off the whole plate.

Once prepared, it can be served alongside rice or orzo, but I've never had any complaint from just eating it solo. I've also included tofu cubes along with the shrimp before, and recommend adding them with the broccoli so that they have time to get crispy and delicious. Enjoy! And trust me... you have time.

Monday, February 2, 2009

Bastardized Beet Salad with Bacon and Cornbread Croutons

I've had this salad bookmarked in my January 2009 "Bon Appetit" issue for a few weeks now, but seeing the guys at The Bitten Word's recent attempt definitely bumped the recipe into my "To Try SOON" mental folder.

(Doesn't that look amazing?! Photo from Bon Appetit)

When I saw a package of vacuum-sealed, pre-steamed beets at Trader Joe's last week, it was a done deal. Now, I definitely applaud Clay and Zach's preparation because this is one complicated dish. It sounds simple enough- roasted beets, goat cheese, country ham, and cornbread croutons with a citrus vinaigrette- but once you get into the recipe, there are a lot of things going on. Certainly way too much going on for my 8:30 cooking time crunch after Property class on a Monday night, so this was going to have to be "bastardized" (I don't know if that's a proper useage of the term, but it's certainly fun to say!).

I'm not usually a big proponent of the "supermarket shortcuts", but in some cases the margin of difference between the homemade and the shortcut is way too slim for me to bother. Thus, pre-steamed beats! Thanks, TJ's. These cut out the messy and time-consuming roasting and peeling steps for beets and makes them a much more attractive quick meal option. The package contains about 6 small beets, which I cut into 1/8 size wedges for the salad.

Some other shortcuts would have to be made as well to par this recipe down to weeknight achievement level. I love cornbread and am completely loyal to my stepmom's version, which comes from her mom. She was from Alabama- that's authentic enough for me!

(Hey- it's a classic for a reason!)

Plus, it literally comes together in about 3 minutes of prep time. I've made other cornbreads from scratch, but this one is perfect for a simple salad. You can also add anything into the batter; I had some extra green onions, so in they went! Once the cornbread was baked and cooled, I cut it into four slices, diced one into cubes and placed them into the oven to toast and become croutons.


Now, the country ham part sounds great but a) apparently country ham is hard to come by in the D.C. area, b) I don't have any in the fridge tonight, c) I love bacon, and d) I have bacon. Done!
(yum.)

Finally, the recipe's citrus vinaigrette also sounds amazing but a little too complicated for weeknight post-class cooking. I decided to check with my go-to reference, Mark Bittman's How to Cook Everything, which is truly a cooking encyclopedia. Pages 90-94 are filled with variations on vinaigrettes, allowing me to concoct a blood orange variety that I hoped would match well with the earthy beets and creamy goat cheese- and of course, salty bacon! Plus, I figured that the blood orange segments would be a natural addition to this salad, and they look gorgeous.


Once the cornbread is baked, croutons toasted, beets steamed (or microwaved, if you have that TJ's option), and vinaigrette concocted, all that's left is assembly. I placed the croutons at the bottom of the bowl and topped them with the beet wedges, blood orange segments, green onions (just 1 chopped scallion, green and white parts), crumbles of goat cheese (this was an herb chevre from TJ's, but really any flavorful goat cheese will be great), and bacon pieces, then drizzled the blood orange vinaigrette on top.

(so, my photography skills leave a little to
be desired, but this was really pretty!)

Honestly- I was betting that this was going to be good, but I really had no idea. This salad is great. The flavors worked perfectly together and there was enough going on that it wasn't a boring or wimpy salad at all- I had just this (and ok, a slice of cornbread- it was just sitting there waiting!) for dinner and was totally satisfied. And despite the various components, it really does come together quite quickly- if you made the cornbread in advance, it would be almost all assembly time.

So, below is my bastardized version of this delicious beet salad- let me know how it goes if you try it out!

Bastardized Beet Salad with Bacon and Cornbread Croutons
adapted from
Bon Appétit (January 2009)

-2 servings

BEETS

*1 package Trader Joe's steamed and peeled baby beets; or alternatively, 6-8 small baby beets, steamed and peeled.

-Warm beets and cut into 1/8 size wedges.

CORNBREAD CROUTONS

* 1 package Jiffy cornbread mix
* 1/3 cup milk (preferably whole)
* 1 large egg

-Prepare cornbread according to package directions. Cut 2 slices into cubes. Spray a baking sheet with cooking spray and toast at 375 degrees for 15-20 minutes, until croutons are crisp.

BLOOD ORANGE VINAIGRETTE

* Juice of 1 blood orange half (about 1/4 cup)
* 1 tablespoon lemon juice
* 1/8 teaspoon salt
* 1/3 cup olive oil

-Whisk blood orange juice, lemon juice, and salt together. Continue whisking and add the olive oil in a slow, steady stream. Taste and season to your preference.

SALAD

* 3 slices bacon, chopped
* 2 green onions, chopped
* 1 tablespoon finely chopped Italian parsley
* 2 oz. soft fresh goat cheese, crumbled
* Sea salt and cracked black pepper, to taste

-Saute bacon in a skillet over low heat until the pieces are lightly browned and crisp; drain on a paper towel.

-Assemble salad: corn bread croutons, beets, orange segments, bacon, green onions, parsley, goat cheese, and salt and pepper to taste. Drizzle vinaigrette and enjoy!

Sunday, February 1, 2009

Baking Update

Update on those almond scones... a definite success! I found (and starred on Google Reader, my new favorite tool ever) this recipe on the excellent blog Lottie + Doof, which Tim adapted from Dorie Greenspan. Unfortunately, my camera battery decided to be on the fritz for my first blog picture attempt, but I did freeze eight of the pre-baked scones per Tim's suggestion and promise to capture their delightful image soon. I'll post the recipe below- as I've said, I am NOT a baker but I'm trying, and this was my very first attempt at scones from scratch. I love almond flavor in any form, and these have the perfect amount- not too cloying and not too faint. My only suggestion would be to really press the sliced almonds on top of the formed dough scones- those suckers are very prone to falling right off once baked.

Now that I think about it, I think that these scones are only the fourth thing that I've ever baked "from scratch" as an adult (not counting cookies and such growing up, because that was supervised and my input was usually just bowl-licking), and thankfully all of them have turned out pretty decently. The first that I can remember was chocolate peppermint cookies for my first holiday season in D.C. During this glorious pre-law school time, I was always searching for a post-work activity (besides happy hour) and decided to bake Christmas cookies as gifts for my friends and co-workers. I don't remember much about how they turned out, but I don't think there were any complaints. However, I still have the bag of peppermint candies used to make the topping- anyone know how long those things last??

The second attempt was this summer, when I decided to make a peach and blackberry cobbler with crystallized ginger biscuits (recipe from Bon Appetit's July 2008 issue). It was my first venture at using my new, gorgeously blue Kitchen-Aid mixer (light of my life! Or definitely my kitchen) and if I do say so, a rousing success. I remember yelping in delight- "I made DOUGH!"- once the mixer had worked its magic and I was rolling out actual biscuit dough on my authentically floured wood board- I was baking! It's the small things, I guess. In any case, that cobbler was amaaaazing and I can't wait to break it out again this summer.

Baking success #3 was almost an epic FAIL, but thankfully saved at the last minute. My friend Lillian was planning her New Year's Eve get together, and I decided to try Amanda Hesser's recipe for meyer lemon sable cookies from her book "Cooking for Mr. Latte" (one of my absolute favorites, as evidenced by its completely battered and stained condition- oops). Amanda suggests making the cookies a couple days in advance, if you can resist eating them entirely, in order to let the lemon flavor fully develop. So I decided to spend a leisurely Saturday afternoon making the dough- went through all the steps, lovingly wrapped the tubes of dough in plastic wrap to rest in the fridge, ate a crapload of the dough scraps from the mixing bowl, defended said dough-eating against my boyfriend's concerns that it contained raw eggs- "there aren't any eggs in the recipe! I don't know that works, but it tastes great!", and plopped on the couch to review the recipe for the next steps. "Hmm... did that, did that, good, great... 4 egg yolks. Oh crap." Having no baking experience and definitely no advice from Amanda on what to do if you make the dough without any egg yolks, I had no clue how to remedy this screwup. So I decided to just pretend I hadn't already beat the hell out of the dough, dumped the cold rolls back in the mixing bowl, added the egg yolks (side note- I love separating eggs. I think doing it successfully makes me feel all chef-y and professional, which I am far from in reality), and mixed them into the dough. Praying that I hadn't overbeaten or abused my poor cookie dough, I put the logs back in the fridge and hoped for the best. In some baking miracle, they actually turned out great- lemony little gems with a nice hint of sea salt. But yeah... I think that episode demonstrates why I like to think of myself as a cook and not a baker. I like improvising, which there is very little room for in baking, and that very slim margin of error for things like "oops! forgot the eggs!" is certainly an obstacle for me. But hopefully the more I try, the less hilarious errors like that I will make.

So, that brings us back to the almond scones and their recipe- here you go. Thanks to Tim again for the inspiration and the recipe!

Almond Scones

  • 1 cup blanched almonds (whole, slivered, or sliced), toasted
  • 2 tablespoons sugar
  • 1 large egg
  • 1/3 cup cold heavy cream
  • 1/4 cup cold whole milk
  • 1/4 teaspoon pure almond extract
  • 1 3/4 cups all-purpose flour
  • 1 tablespoon baking powder
  • 1/4 teaspoon salt
  • 1 stick (8 tablespoons) cold unsalted butter, cut into small pieces
  • 1/4 cup sliced almonds (optional)

Preheat the oven to 400° F. Line a baking sheet with parchment paper.

Divide the toasted almonds in half. finely grind 1/2 cup in a food processor or blender with the sugar, taking care not to overgrind the nuts and end up with almond butter. Finely chop the other 1/2 cup of almonds.

Stir the egg, cream, milk and almond extract together.

Whisk the flour, ground almond/sugar mix, baking powder and salt together in a large bowl. Drop in the

butter and, using your fingers toss to coat the pieces of butter with flour. Quickly, rub the butter with your fingers into the dry ingredients until the mixture is pebbly. You’ll have pea-sized pieces, and some smaller pieces.

Pour the liquid ingredients over the dry ingredients and stir with a fork just until the dough, which will be wet and sticky, comes together. Don’t overdo it. Stir in the chopped almonds.

Still in the bowl, gently knead the dough by hand, or turn in with a wooden spatula 8-10 times. Turn the dough out onto a lightly floured board and divide it in half. Working with one piece at a time, pat the dough into a rough circle that is about 5 inches in diameter, cut into 6 wedges and top each wedge with slices almonds if using. Place them on baking sheet.***

Bake for 15-20 minutes or until their tops are golden and firm-ish. Transfer to a wire rack and cool for 10 minutes before serving.

***Once the scones are cut out and on the baking sheet you can also freeze some or all of them before baking. Simply put the tray of scones in the freezer and wait until they are firm. Put the frozen scones in a freezer and you’ll have fresh warm scones whenever you like. Do not defrost, simply put the frozen scones on the a parchment lined baking sheet and add a couple of minutes to the baking time.

La Dolce Bacon Begins

New year, new resolutions... well, a month late or so. I've been kicking around the idea of a food blog for a while- at last count, I subscribe to 35 on my Google Reader!- so we'll see how this goes.

With a crazy life juggling law school and "the day job" at a law firm, cooking is my little moment of zen every night and of course, those precious lazy weekend days. There's really nothing better (well ok, there are a few things better, but most are unavailable on a weeknight at 8:30 pm) after coming home from my long day at work and class than immediately turning on today's episode of "Barefoot Contessa" from my trusty DVR and unwinding in the kitchen. I am possibly the least creative person on the planet- no artistic, musical, or dramatic talent whatsoever. But when I started cooking a few years ago, I realized that- finally- I had found my outlet. It's taken a few years and is certainly an endless ongoing process, but I love getting comfortable with both flavors and techniques. I think that there are cooks and there are bakers- and I'm definitely not a baker, but I have been trying lately! In fact, I'm planning to tackle a recipe for almond scones tonight (not the typical Super Bowl recipe, but I'll live)- I'll let you know how it goes.

Oh- the name. As you can guess, I love bacon! Like, a lot. And since I love all things Italian, "La Dolce Vida" ("the sweet life") is a pretty good goal to aim for. Putting the two together just feels natural.